Bone Broth is becoming quite trendy at the moment! The benefits are being touted all over the place.place. I’ve talked before about the benefits of broth here and here, but even so, let’s not go overboard! There is little evidence to back the claims up, and studies that have been done are using nutrients from the broth in a supplement, so not the same (read here for more info).
Nonetheless, I love it. For the simple fact that it’s cheap (unless you buy it out, then it’s suddenly not anymore!) and lets me add extra protein to other dishes such as soups, I like making it. And although I’m sure a lot of the claims are over-hyped (you probably won’t look 21 again from drinking collagen!) it doesn’t mean there’s not some wisdom in it: many cultures give new mums bone broth as part of their post natal diet, and I’m sure they have their reasons.
So, my recipe. I always do broth in my slow cooker, as I leave it overnight and my stove switches itself off, but you can do it in a stock pot on the hob. Just bear in mind you need to leave it for a while: I aim for 24 hours with bones this big (smaller bones like chicken don’t need as long).
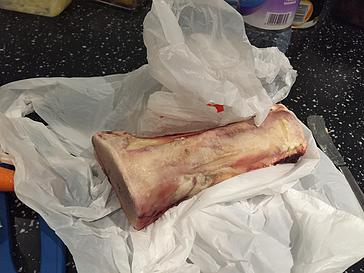
First, I put this bone, which was £1.50 from the local butcher, into the oven for about 40 mins on 180 degrees. This is for 2 reasons: first, it gives the broth a much nicer flavour (and smells lovely!); second, roasting the bone helps it to break down so you get more nutrients in your stock.
This is a marrow bone, which is nutrient dense and has a great flavour, but you can use any bones you like. Bones like hooves or knuckles are more gelatin rich, and have more collagen and glucosamine in them, so great for joints and postnatal recovery.
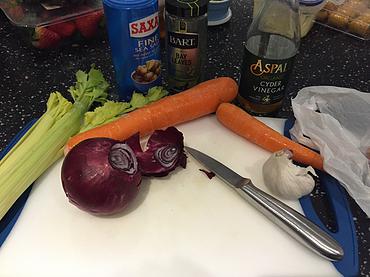
Then I put it in the slow cooker (or stock pot), cover it with water and add about a tablespoon of cider vinegar or lemon juice (again this helps to break the bone down), and I also add a tablespoon of orange juice. I read somewhere that this helps with drawing out nutrients too, and I got a really nice flavour when I tried it so have stuck with using it!
In the slow cooker you just leave it on low, otherwise bring to the boil then reduce to a simmer. Over the first few hours you can get some scum rising to the top; just scrape this off. (OK, confession- I never do this. I just always read that you should. I’ve never found this scum, although I do sometimes find there’s sediment in the finished broth that I throw away.)
For the last few hours of cooking I add a few vegetables; usually whatever I have lying around. Here I’ve chopped up 2 carrots, an onion, some old celery (soup or juicing is a great way to use up fruit and veg past it’s best) a clove of garlic (which I smashed open to help the flavour), and a couple of bay leaves:
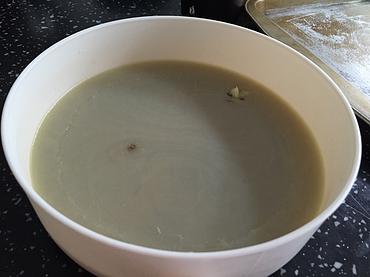
Depending on what you’re using it for and how strong you like it, you can take the lid off and reduce it down when you’ve finished. I like to do this and get a ricker flavour. Then just cool and drain through a sieve.
You can change the concentration of the gelatin in there, which is visible on the consistency when the broth is chilled, by decreasing the ratio of water to bones. Less water and more bones will result in a higher concentration of gelatin, so the broth will be more jelly-like when cold. Sometimes I return the broth to the heat once I’ve drained it and reduce it down to get a stronger flavour.
Once chilled it looked like this:
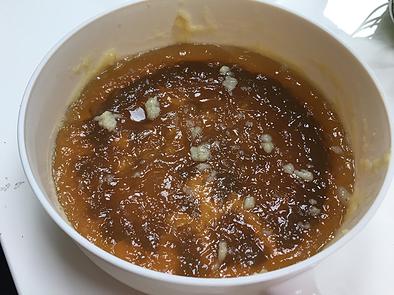
mmmmm, yum. I scrape the fat off and you can see the consistency underneath:
I often divide it up into 500ml containers and freeze some for stock. You can use it in casseroles, or for soup, or just heat and drink it. I know this doesn’t look hugely appealing, but once you’ve warmed it it’s runny again.


Leave a Reply
Want to join the discussion?Feel free to contribute!